Showing posts with label recipes. Show all posts

Sunday, 26 February 2017

Filipino Chopsuey Recipe (Vegetarian)

Serves 2
 Ingredients:
Please ignore my use of chicken broth and real oyster sauce.

1 lb or 1/2 kg of mixed (fresh or frozen) vegetables (broccoli, carrots, bell pepper, cabbage, snow peas, baby corn)
1 medium chopped onion
2 tbsp minced garlic
2 cups vegetable stock (or 2 cups water + 2 tsp vegetable stock powder)
4 tbsp vegetarian "oyster" sauce (which is made of mushrooms)
2 tbsp cornstarch
2 tbsp oil
Optional:
1 can quail eggs
If you're not vegetarian, you can add 1/2 lb of chicken, beef, pork, and/or shrimp.
Salt and pepper to taste


Procedure:

1. On medium-high heat, add 2 tbsp oil and sautee onion and garlic until fragrant.
2. Add in vegetables and sautee until tender.
3. Add 4 tbsp oyster sauce.
Whoah! The corn has disappeared! Magic! JK I added it after this step.
4. Pour in mixed 2 tsp cornstarch with 2 cups of stock and continue stirring until the sauce has thickened.
5. Add optional items and continue cooking for 1 minute.
6. Enjoy with rice!


Tuesday, 24 January 2017

Tuna Spaghetti Recipe

Tuna Spaghetti Filipino Style

     I was craving for the tuna spaghetti my aunt used to make us so I made some but added mushrooms. So here's my take on it!

Serves 4
Preparation + Cooking Time: 30 mins

Ingredients:

500g (1 pound) spaghetti
2 cans tuna flakes in oil
1 370mL can of tomato sauce (preferably Filipino brands like UFC, Fiesta or Papa. If not using Filipino tomato sauce, add 4 tbsp ketchup and 2 tsp sugar. Filipino pasta sauce is sweet! or skip this if you don't want Filipino style.)
1 medium onion
1 cup sliced crimini mushrooms (optional)
salt and pepper to taste

Procedure:

1. In a large pot of boiling water, cook your pasta for 12-14 min or according to packaging instructions. Strain and set aside.

2. In a smaller pot with medium-high heat, sautee your onions and mushrooms until tender.

3. Add the tuna and cook for 2 minutes.

4. Add the tomato sauce, ketchup and sugar and let simmer until sauce thickens.

5. Add salt and pepper to taste.

6. Assemble your dish and enjoy! (Optional: Add grated cheese if you like, preferably Eden cheese brand.)


Friday, 30 December 2016

Crema de Fruta Recipe

 
Crema de Fruta/Graham Cake (No Bake!)

        Finally, a new post! This holiday has been very busy with all the partying everyday (aka eating and singing karaoke because I'm Filipino af.).

        Crema de Fruta literally translates to "Fruit Cream" in Spanish and is one of many results of 333 years of Spanish colonization in the Philippines. Originally, this is made with two layers of sponge cake with the cream and fruits in between and on top. I am not sure how the use of Graham crackers came about, but I'm guessing that is a result of American colonization.

        This is what I served as a dessert during my family's Christmas dinner, as well as during my boyfriend's family's dinner and my friend's potluck. I hope you enjoy this recipe and wish you a Happy 2017!

Serves 12

(This needs to be prepared at least 4 hours in advanced for the Graham crackers to be able to absorb the cream.)

Ingredients:

Graham crackers (I used about 2 packages from the box. They are a little bit hard to find. If you're in the Philippines, definitely use about 2 packages of M.Y. San.)
1 cup evaporated milk
1 container Cool Whip
1 big can (796 mL) mixed fruit in fruit concentrate
unflavoured gelatin (enough to cover 1 cm or 1/2 inch of top layer. I used 2 packets of Knox gelatin)

Procedure:

1. Arrange a layer of graham crackers on the bottom of the baking dish.

2. Mix the evaporated milk and Cool Whip to make a cream.
The consistency should be slightly thick that it ribbons.
You can also use 1 can of condensed milk and 473 mL of whipping/heavy cream. Or if you are in the Philippines, just use all-purpose cream.

3. Spread a layer of cream on top of the graham crackers.

4. Scatter a layer of fruits on top of the cream layer.

5. Repeat the layering process until there's at least an inch space on top.

6. Set aside in the fridge.

7. Cook gelatin per your brand's instructions. Let cool.

8. Pour the gelatin on top very carefully to avoid melting the cream. (As you can see in the picture, I did just that.) Set in the fridge overnight.

9. Serve chilled and enjoy!
This one has slices of peach on top, and no gelatin.

      Another option is to make a parfait! The process should be similar minus the gelatin on top, and break the graham crackers into pieces.


Thursday, 22 September 2016

Beef Curry Udon Recipe

 
    It's been raining here in Calgary and my boyfriend was craving for something with curry. I usually put coconut milk and chicken whenever I make curry. But this time, it's different! I'm using dashi stock to be consistent with the udon soup, and cubed chuck beef. You can put whatever meat you like. Compared to other traditional noodle soup stocks, this will have a slightly thick consistency.

Serves 4

Ingredients


4 packs udon
3/4 cup butter
1 lb chuck/stew beef
2 large onions, diced
2 cups water
salt and pepper to taste

Curry base:
2 tbsp curry powder
2 tbsp garam masala
1 tbsp turmeric
1/4 cup flour
2 tbsp Worsterchire sauce
1 tbsp ketchup
(you can also use 4 cubes of curry roux instead)

Mentsuyu (Noodle soup stock):
8 cups water
1/2 sheet kombu/dried kelp
15g (a large handful or half a pack) katsuobushi/dried bonito flakes (more if you like a more fishy taste)
2 tbsp mirin
2 tbsp soy sauce

Toppings (optional):
egg
green onions
carrots
bean sprouts
enoki mushrooms
bamboo shoots
corn
cheese
naruto/fish cakes
nori seaweed

Procedure

1. We need to prepare the kombu for the dashi first. Add 8 cups of cold water and 1/2 sheet of kombu in a pot. Leave it to soak for at least 1 hour, up to 8 hours.
I have a whole sheet of kombu here divided into halves to fit into a 16 cup pot because I'm serving for 8.
2. In another pot, melt 3/4 cup butter and sautee the beef in medium-high heat.

3. Once the beef browns, add the onions and continue sauteeing until the onion becomes translucent.

4. Lower the heat and mix all the powder ingredients, Worsterchire sauce and ketchup.

5. Add about 2 cups of water enough to cover the beef and bring to a boil.

6. Turn the heat on the lowest setting and slow cook the beef for 2 to 3 hours until tender.

7. Back again to the dashi, bring the kombu water to a boil. Once there are tiny bubbles forming at the bottom of the pot, add the katsuobushi.

8. When the water starts boiling, turn off the heat and immediately remove the kombu. (Leaving the kombu for too long will result to a bitter taste.)

9. Run the dashi stock through a very fine sieve to get a clear broth.

10. Add the soy sauce and mirin to make the mentsuyu.

11. When the beef has cooked, add the menstuyu to the curry beef.

12. Boil the udon until it's cooked.


13. Assemble the udon! Add the udon and soup to a bowl and add whatever toppings you like, and enjoy!

You can also use the curry base and mentsuyu to make curry ramen, but with less flour to lessen the thickness of the broth.


Wednesday, 24 August 2016

Lechon Kawali Recipe


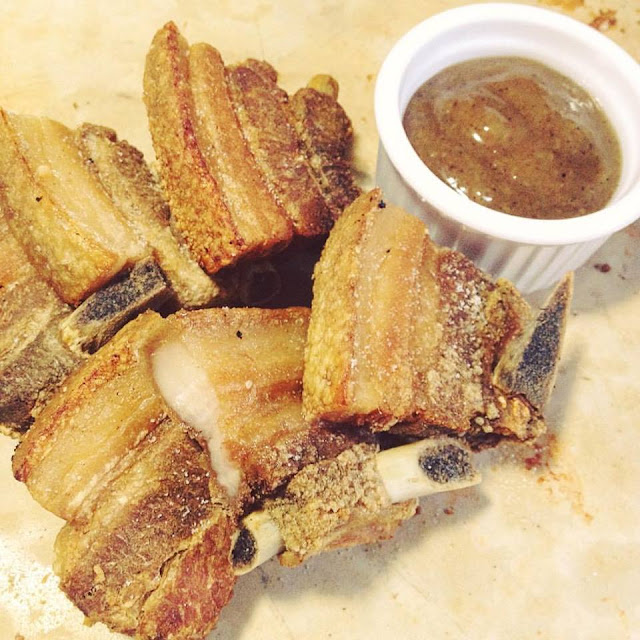
    I've been craving this for a week now so I dragged my mom to go to T & T to get some pork belly. We usually get this at a Filipino restaurant which is about a 30 minute drive from us, but this time my mom and I decided to try our hands on cooking it ourselves!
Lechon kawali is a crispy pork belly deep-fried in a pan or wok (kawali). It is seasoned beforehand, cooked then served chopped into pieces. It is usually accompanied with a lechon sauce such as Mang Tomas or toyomansi (soy sauce with calamansi). - Wikipedia

Recipe:

Ingredients:
  • 1-1.5 kg/2-3 lb pork belly
  • 1 tablespoon salt
  • 4-6 dried bay/laurel leaves
  • 1 tablespoon peppercorn
  • 1 small head of garlic/1 teaspoon garlic powder
  • 1 small onion/1 teaspoon onion powder
Procedure:
  1. Boil water enough to cover the pork belly.
  2. Add all the ingredients in the boiling water and leave for 30 minutes.
  3. Simmer for 30 minutes while skimming the floating scum.
  4. Remove from water and let it cool.
  5. Rub baking powder all over.
  6. Let rest for at least an hour (best overnight).
  7. Deep fry in high (but not smoking) heat until golden brown and fat is crispy.
  8. Cool down before you start eating because you might burn yourself (I totally didn't get too excited and did that *looks away*)
Goodbye diet!